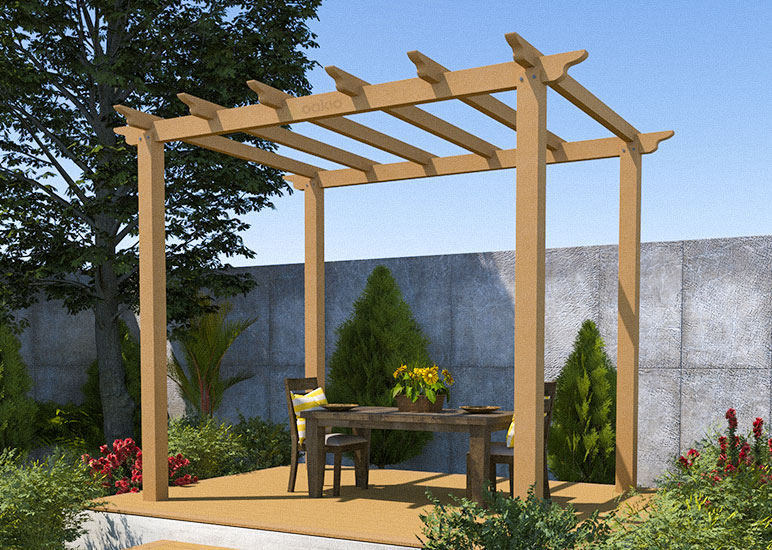
Installation Steps and Precautions of Outdoor Pergola
Outdoor pergolas serve as elegant structures that enhance the beauty and functionality of outdoor spaces. WPC (Wood Plastic Composite) pergola has become a popular choice for exterior wall coverings due to its durability, aesthetic appeal, and ease of installation. In this comprehensive guide, we will explore the installation of WPC pergola along with important precautions to ensure a successful and safe installation.
Materials and Tools You Need for Outdoor Pergola Installation
Installing WPC pergola typically requires the following materials and tools:
Materials:
1. Pergola Kit or Lumber: Depending on whether you’re using a pre-made kit or building from scratch, you’ll need lumber or a pre-cut pergola kit.
2. Post Anchors or Brackets: To secure the pergola posts to the ground or existing concrete.
3. Screws and Nails: For fastening the lumber together.
4. Wood Stain or Sealant (optional): To protect the wood from weathering and extend its lifespan. If you are installing a WPC pergola, then it is not a must because WPC material is fade resistant.
5. Decorative Accessories (optional): Such as decorative end caps, trim pieces, or lattice panels.
Tools:
1. Drill/Driver: For drilling holes and driving screws.
2. Level: To ensure the pergola is installed evenly.
3. Tape Measure: For accurate measurements during installation.
4. Saw: To cut the lumber to the required lengths.
5. Shovel (optional): For digging holes for the pergola posts if not using post anchors.
6. Ladder: For reaching higher areas of the pergola during installation.
7. Safety Gear: Including gloves, safety glasses, and hearing protection.
Before starting the installation of WPC pergola, ensure you have all the necessary materials and tools to complete the project safely and efficiently. Additionally, follow any manufacturer instructions or local building codes to ensure your pergola is installed correctly and securely.
Step-by-Step Installation Guide for Outdoor Pergolas
Step 1: Site Preparation
Begin by selecting a suitable location for your WPC pergola. Ensure that the area is level and free from any obstacles such as trees, bushes, or structures. Mark the perimeter of the pergola footprint using stakes and string to outline the installation area.
Step 2: Install Footings or Anchors
Depending on the design of your pergola, you may need to install footings or anchors to provide stability and support. As shown in the example, we use post base as anchors, then fix the post base jointing with screws.

Step 3: Install the Post
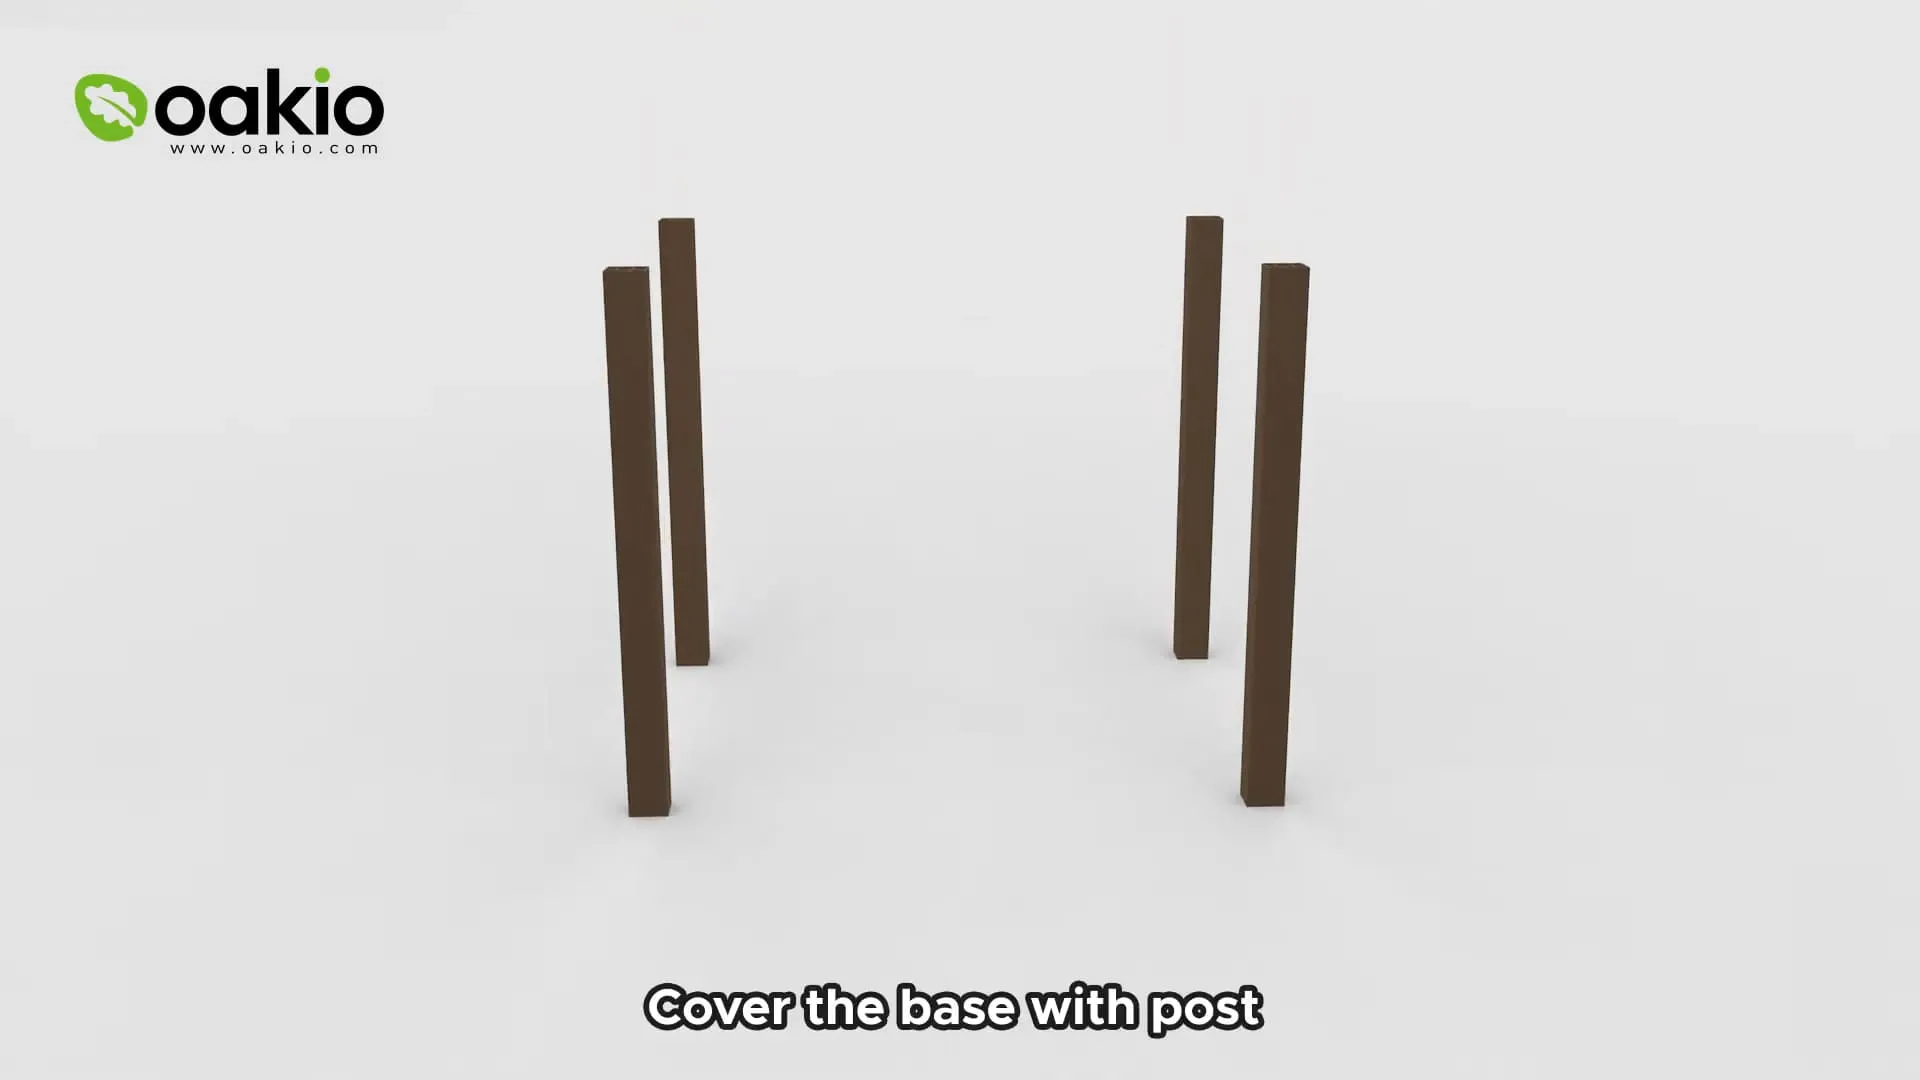
After finishing the installation of the base, cover the base with post.
Step 4: Assemble Pergola Components
Carefully unpack and organize the components of your pergola kit according to the manufacturer’s instructions. Assemble the beams, rafters, and other structural elements of the pergola according to the provided diagrams and guidelines. Here we install the beams as roof.
– Pre-drill on the posts.
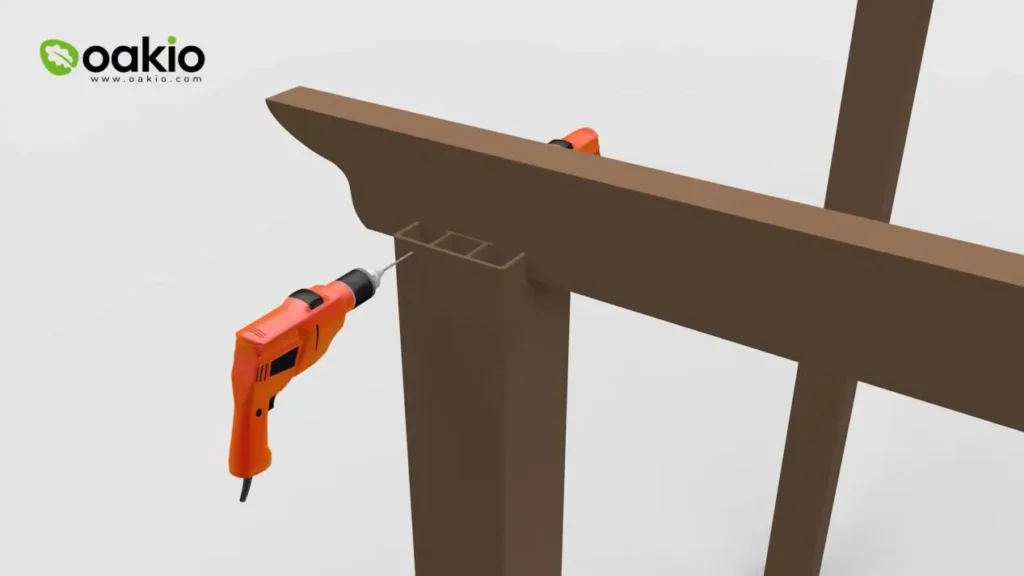
– Install transverse beam with screws.
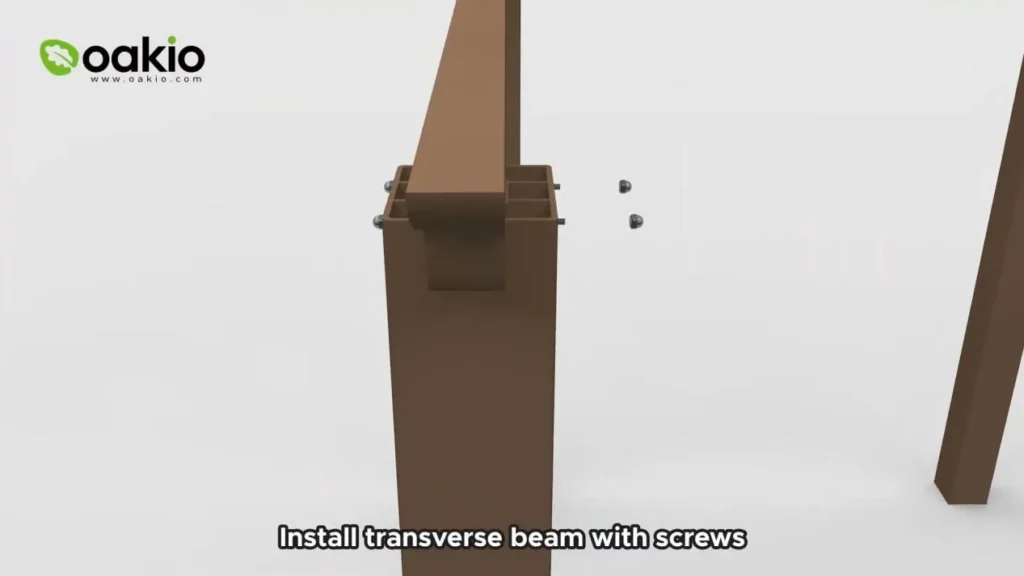
– Put roof beam on the transverse beam, then pre-drill on the top of beams.
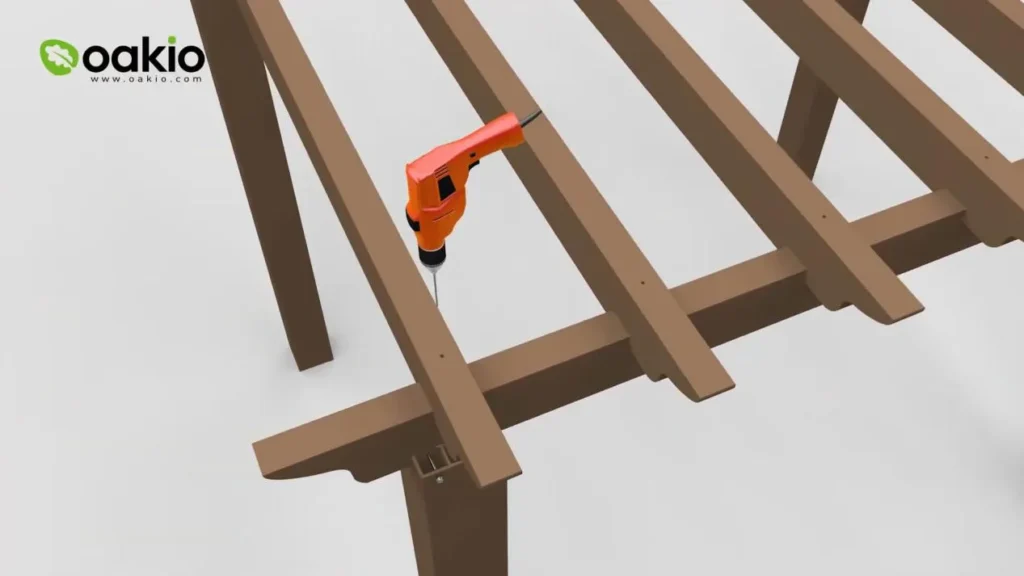
– Fix upper roof slat with screws. Make sure the roof beam are attached to the transverse beam.
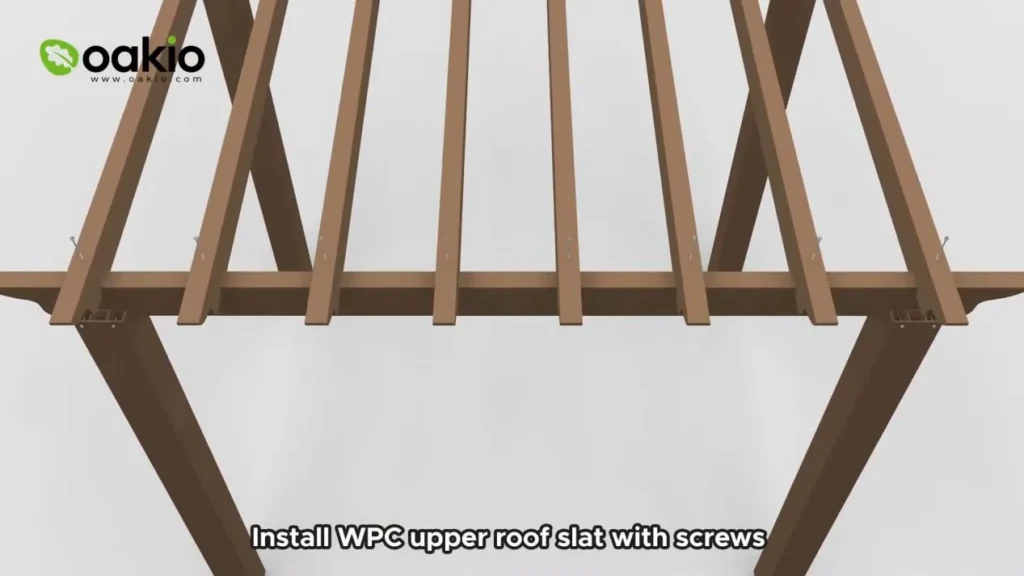
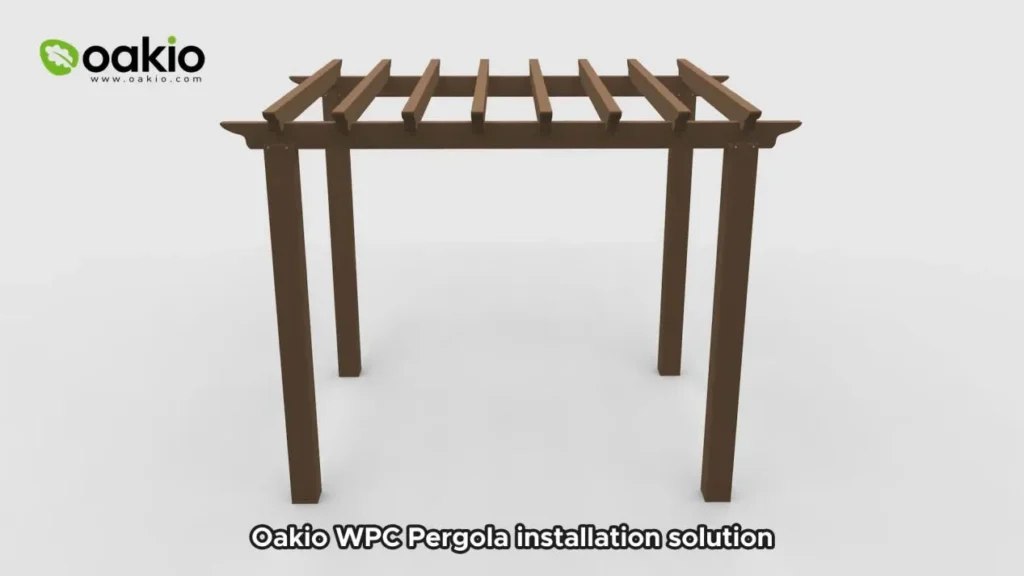
– Finish installing. Check that all components are securely installed.
Step 5: Install Shade Elements (optional)
If your pergola design includes shade elements such as lattice panels or fabric canopies, install them according to the manufacturer’s instructions.
Precautions for WPC Pergola Installation
Here are some tips you should know before installing WPC pergola:
– Safety First: Always prioritize safety during the installation process. Use appropriate safety equipment such as gloves, safety glasses, and protective clothing when handling tools and materials.
– Follow Manufacturer’s Instructions: Carefully read and follow the manufacturer’s instructions and guidelines provided with your pergola kit. Failure to follow instructions could result in improper installation and compromise the structural integrity of the pergola.
– Check Local Building Codes: Before beginning the installation, familiarize yourself with local building codes and regulations pertaining to outdoor structures. Obtain necessary permits and ensure compliance with all applicable codes to avoid potential fines or penalties.
– Ensure Proper Anchoring: Securely anchor the pergola to the ground or supporting structure to prevent instability or collapse, especially in areas prone to high winds or inclement weather.
– Regular Maintenance: Perform routine inspections and maintenance to keep your outdoor pergola in optimal condition. Check for signs of wear, damage, or deterioration and address any issues promptly to prevent further damage.
– Consider Professional Installation: If you are unsure about your ability to install the pergola safely and correctly, consider hiring a professional contractor or installation service to ensure proper installation and peace of mind.
Conclusion
If you are still confused about the installation of WPC pergola, you can also check this video: Easy steps to install WPC composite pergola, which is made by Oakio, a wood composite pergola manufacturer.By following these installation steps and precautions, you can create a stunning outdoor pergola that enhances the beauty and functionality of your outdoor space while providing a comfortable and inviting environment for years to come.
Trending Reading
What Are the Differences Between the WPC Board and PVC Board?
[2024 Update] How Long Does WPC Decking Last?
