How to Install WPC Decking?[Step-by-Step Guide]
Wood Plastic Composite (WPC) decking has gained immense popularity as a durable and aesthetically pleasing alternative to traditional wood. Its unique composition, combining wood fibers and plastic, provides a versatile material for outdoor spaces. In this comprehensive guide, we will show you the step-by-step process of installing WPC decking, ensuring a successful transformation of your outdoor living area.
Materials and Tools You Need for Installing WPC Decking
Before you begin the installation of WPC decking, prepare the necessary materials and tools:
Materials Used for Installing WPC Decking:
1. WPC decking boards
2. Joists
3. Starter clips
4. Screws
5. End caps (optional)
6. Expansion clips (optional)
7. Fascia boards (if desired)
8. Concrete or compacted gravel (for the base)
Tools You Need for WPC Decking Installation:
1. Tape measure
2. Spirit level
3. Saw (circular or miter)
4. Drill with screwdriver bits
5. Rubber mallet
6. String line
7. Decking board spacer
6 Steps to Install WPC Decking
Step 1: Build up the flat ground
Ensure the ground is level and free from debris. If installing on soil, create a sturdy base using compacted gravel. For elevated decks, construct a robust frame using treated joists, spaced according to the manufacturer’s recommendations.

Step 2: Fixing Joist
After finishing the ground base, install the joist on the ground.

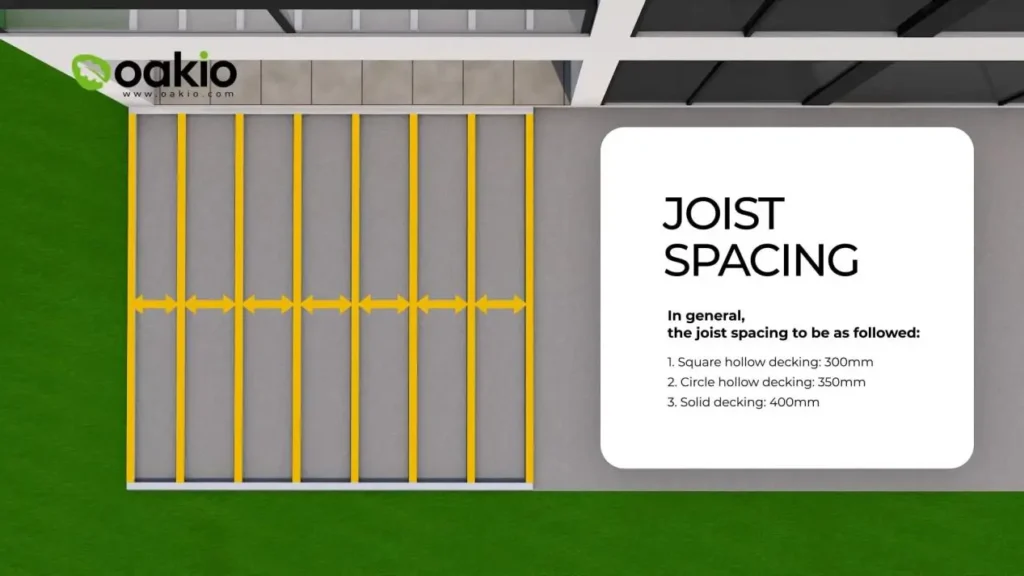
Remember to leave proper space among joists. In general, the joist spacing should be as followed:
- Square hollow decking: 300mm
- Circle hollow decking: 350mm
- Solid decking: 400mm
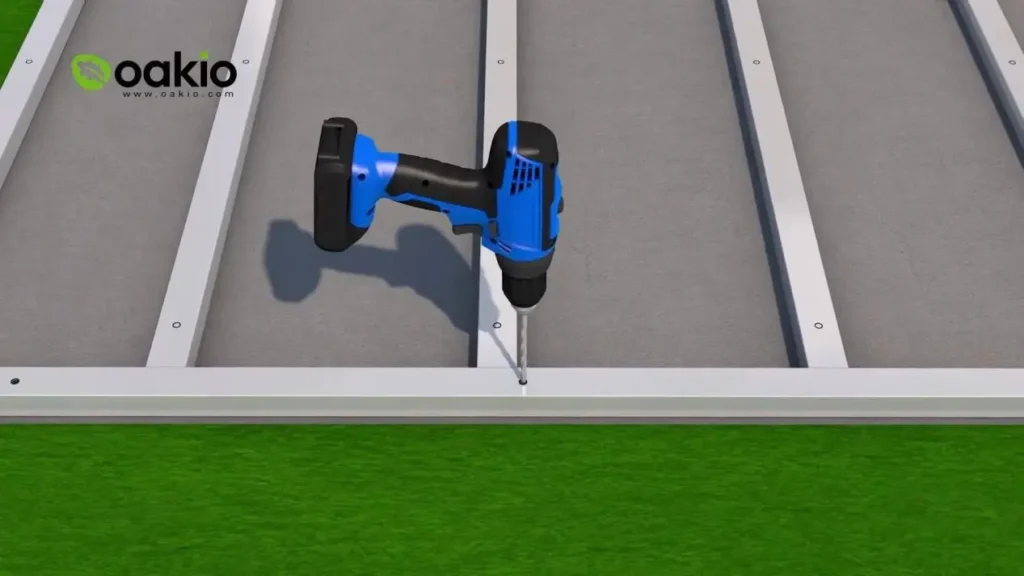
Then, you can pre-drill hole on the joist according to the screw location of WPC decking. It will make it easier for the following installation of WPC decking.
Step 3: Install WPC Decking
Begin by attaching starter clips to the joists along the perimeter. These clips create a secure starting point for the first WPC decking boards. Remember to leave proper space between the starter clip and wall. The started clip distance to wall can be about 8mm.
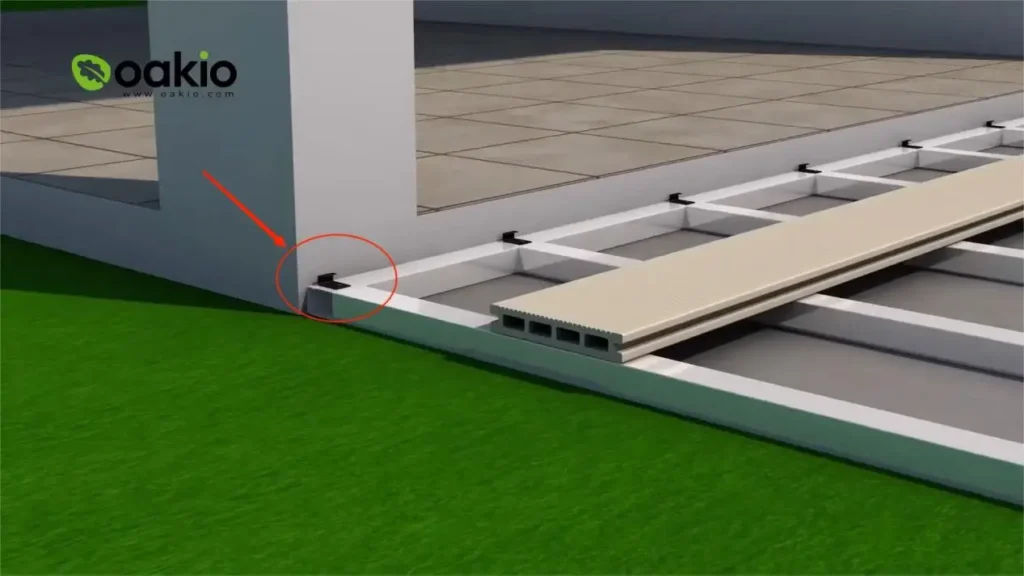
Then, place the first WPC decking board onto the starter clips. Ensure it aligns with the layout marks and joists. Use a rubber mallet to gently tap the board into place, securing it onto the clips.
After finishing the first WPC board, you can start installing the remaining board one by one. Insert decking board spacers between each board when installing the board to maintain consistent expansion gaps. The proper distance among deckings is about 6mm. These gaps allow for natural expansion and contraction of the material in response to temperature and humidity changes.
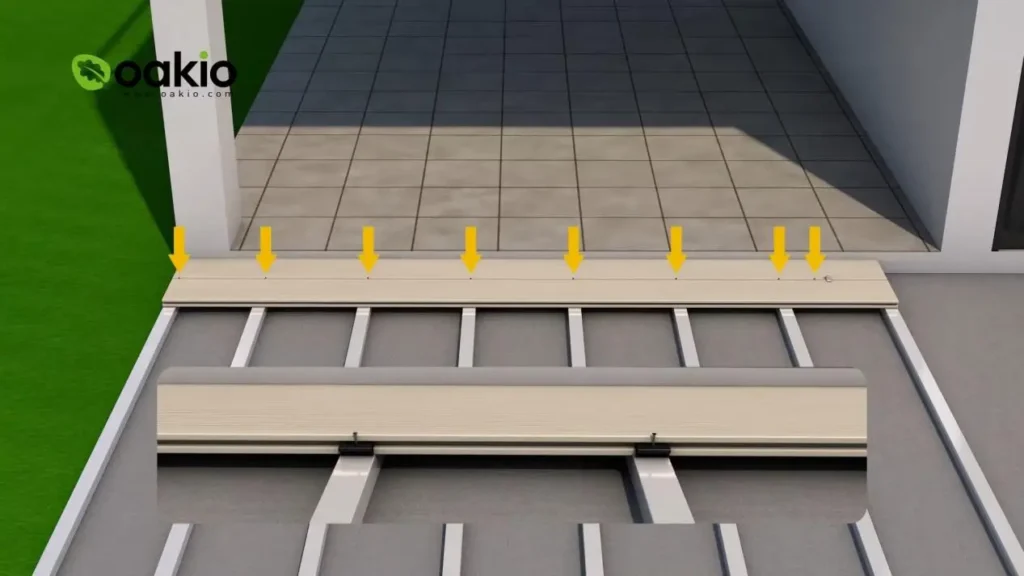
And you can use a spirit level regularly to ensure the boards remain level and flat. Cut boards if needed using a saw for a precise fit. Repeat these process until it almost comes to an end.
When it is about to install the penultimate piece of WPC decking, install another row of the starter clip on the joist, then install the last piece of decking first.
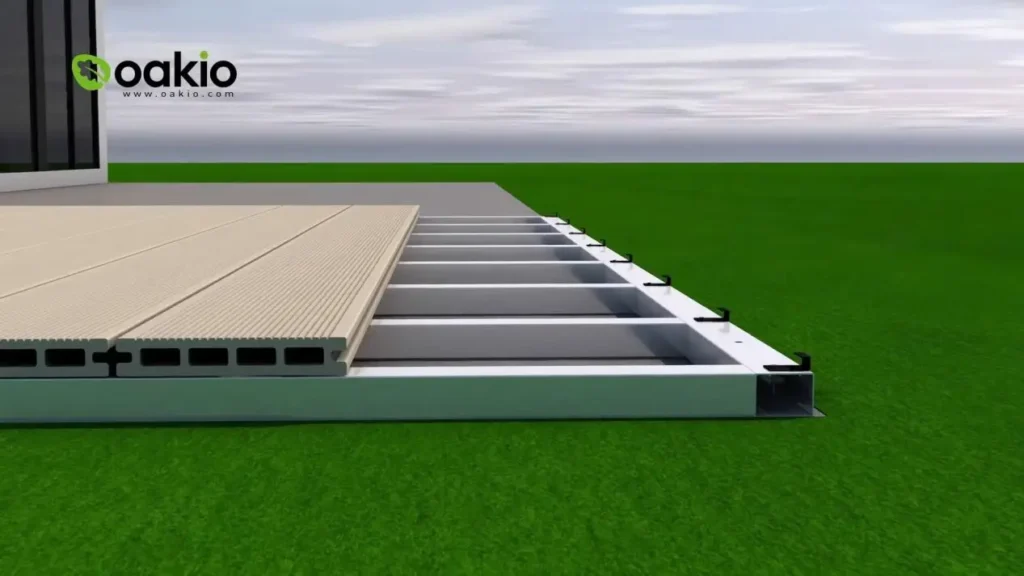
After finishing the installation of last piece of decking, you can install the penultimate piece of WPC decking. For the penultimate piece of decking, measure and cut the WPC decking boards to fit. Don’t forget to leave an appropriate expansion gap.
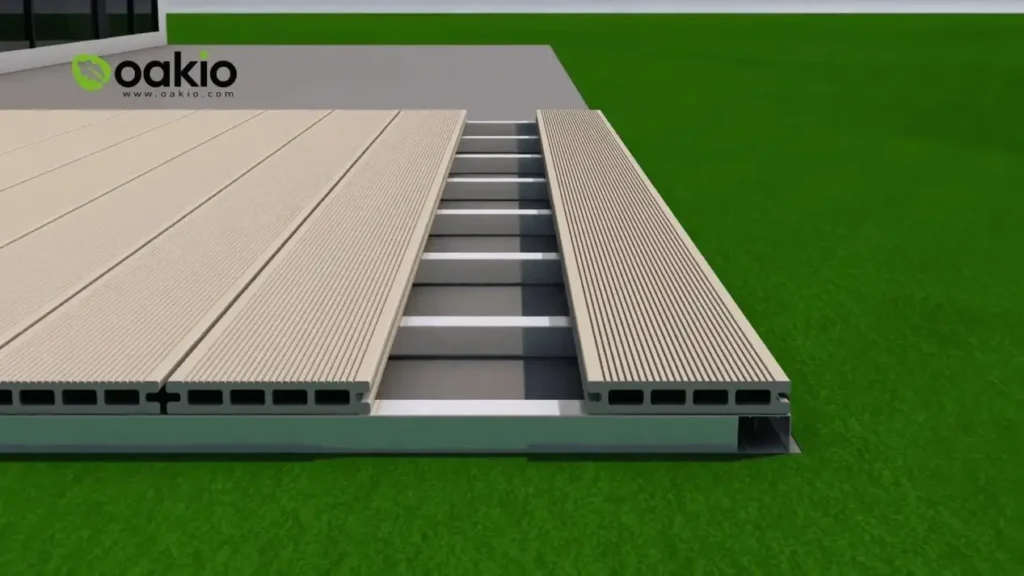
Install the board.

Step 4: Decking installation at different angles
When installing WPC decking at different angles, you can simply swift the angle and use the same installation methods mentioned above.
– Install the starter clip on joist (remember to leave proper space between clip and board, which is about 6-8mm)
– put WPC board on the starter clip
– drill the screw into the board
– leave 6mm gap, then install the next board
– repeat the installation steps mentioned above


Step 5: Fascia Installation (Optional)
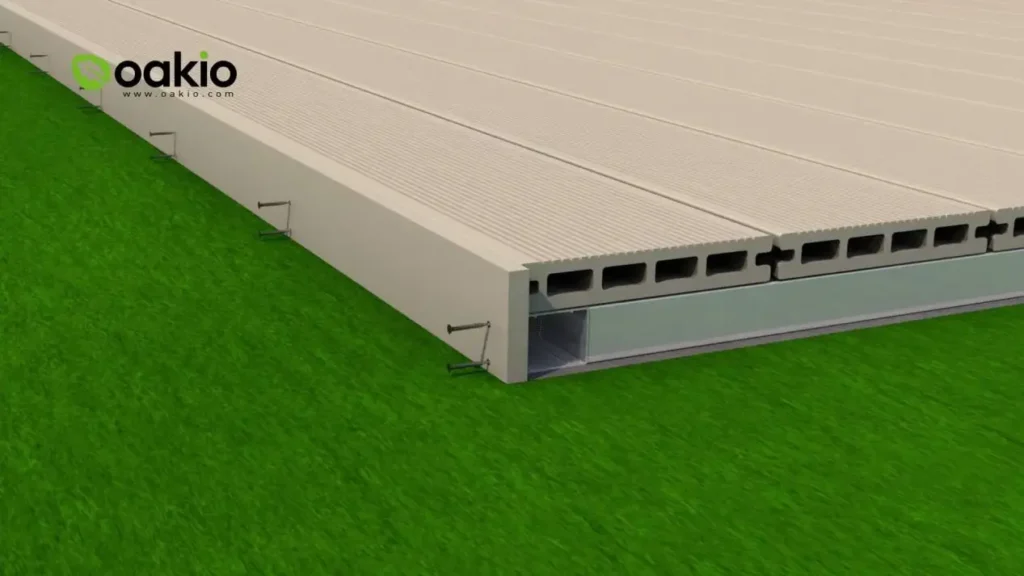
Fascia is a piece of board that cover the bare side of the decking. It can keep moisture from entering the decking’s interior. If desired, install fascia boards to cover the exposed edges of the WPC decking for a finished look. Attach fascia boards securely using screws.
Step 6: Check the Overall Situation
Once the installation of WPC decking is complete, clean the WPC decking surface using a mild soap and water solution. Regular maintenance involves periodic cleaning to preserve the material’s longevity and appearance.

Conclusion
If you are still unclear about the steps after reading this article, you can also check this video: How to Install WPC Decking, which is made by Oakio. Installing WPC decking is a rewarding DIY project that can transform your outdoor space into a functional and visually appealing area. By following these step-by-step guidelines and paying attention to details, you can achieve a professional-looking installation that enhances the beauty and usability of your deck. Whether you’re a seasoned DIY enthusiast or a first-time installer, WPC decking provides an accessible and durable solution for creating an inviting outdoor oasis.
Trending Reading
What Are the Differences Between the WPC Board and PVC Board?
[2024 Update] How Long Does WPC Decking Last?
